Project overview
LifeMoves provides shelters and services for people experiencing homelessness. They approached Sliced Bread to design a workshop for their donor families and kids to learn more about what homelessness means, how LifeMoves helps the homeless, and how they can get involved.
The goal was to have an engaging 90-minute workshop where families could participate in activities and discussions about the causes of homelessness and brainstorm ways to help.
Skills
UX design, game design, storytelling, illustration, video editing
Duration
Aug. 2018 - Sept. 2018
The challenge
Finding the right balance
We wanted to create an educational experience that would resonate with kids ages 8-13, fostering empathy for a complex and sensitive topic. The workshop had to be engaging enough to keep their attention, with activities and discussions accessible to younger kids without feeling too juvenile for older ones.
Designing the workshop
Outlining the flow
I joined this project after initial interviews were conducted with donor families about how they wanted to be more involved with the LifeMoves community. The research helped inform the core workshop concepts: discussions on being unsheltered, Bay Area living costs, a real family’s experience with LifeMoves, and ways for both adults and kids to get involved. I brainstormed kid-friendly activities and artifacts based on the initial concepts.
Outline for a video about a real family’s LifeMoves experience
Sketches for the budgeting game
Drafts for video and presentation illustrations
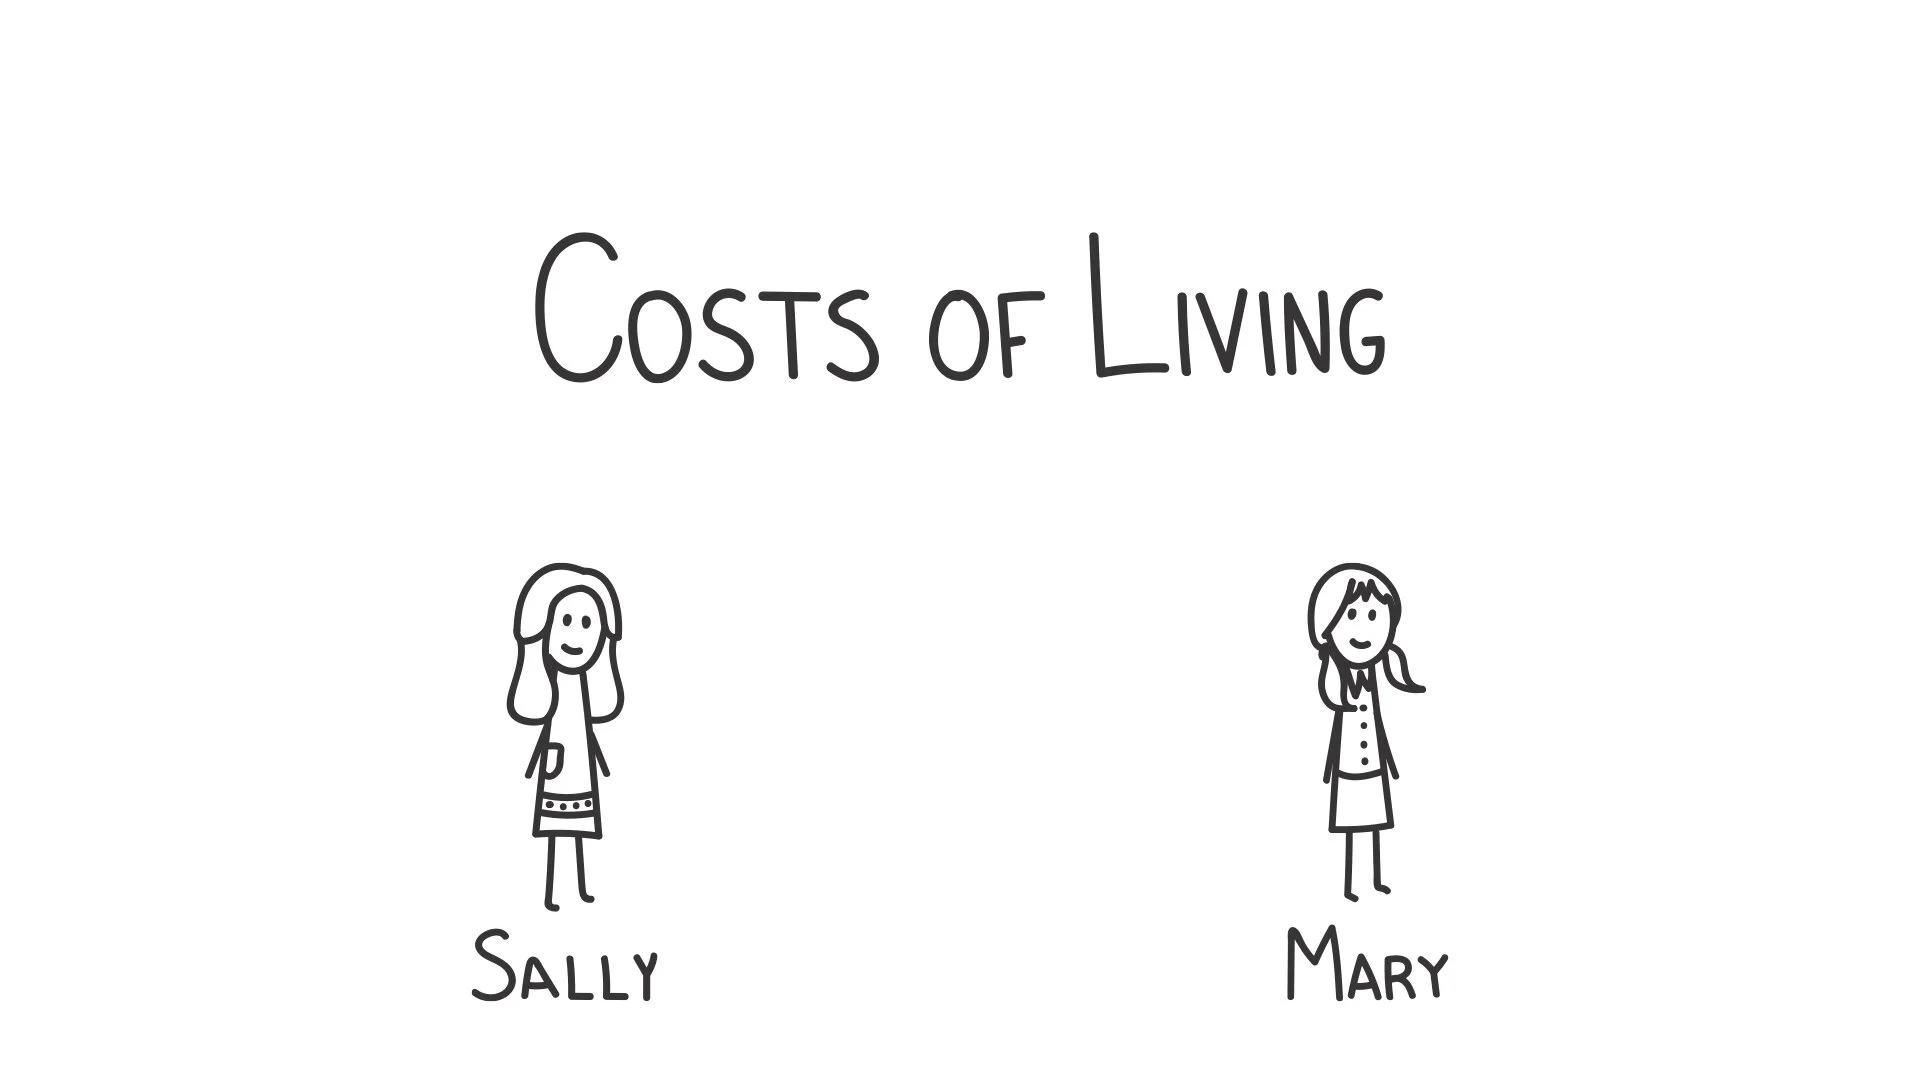
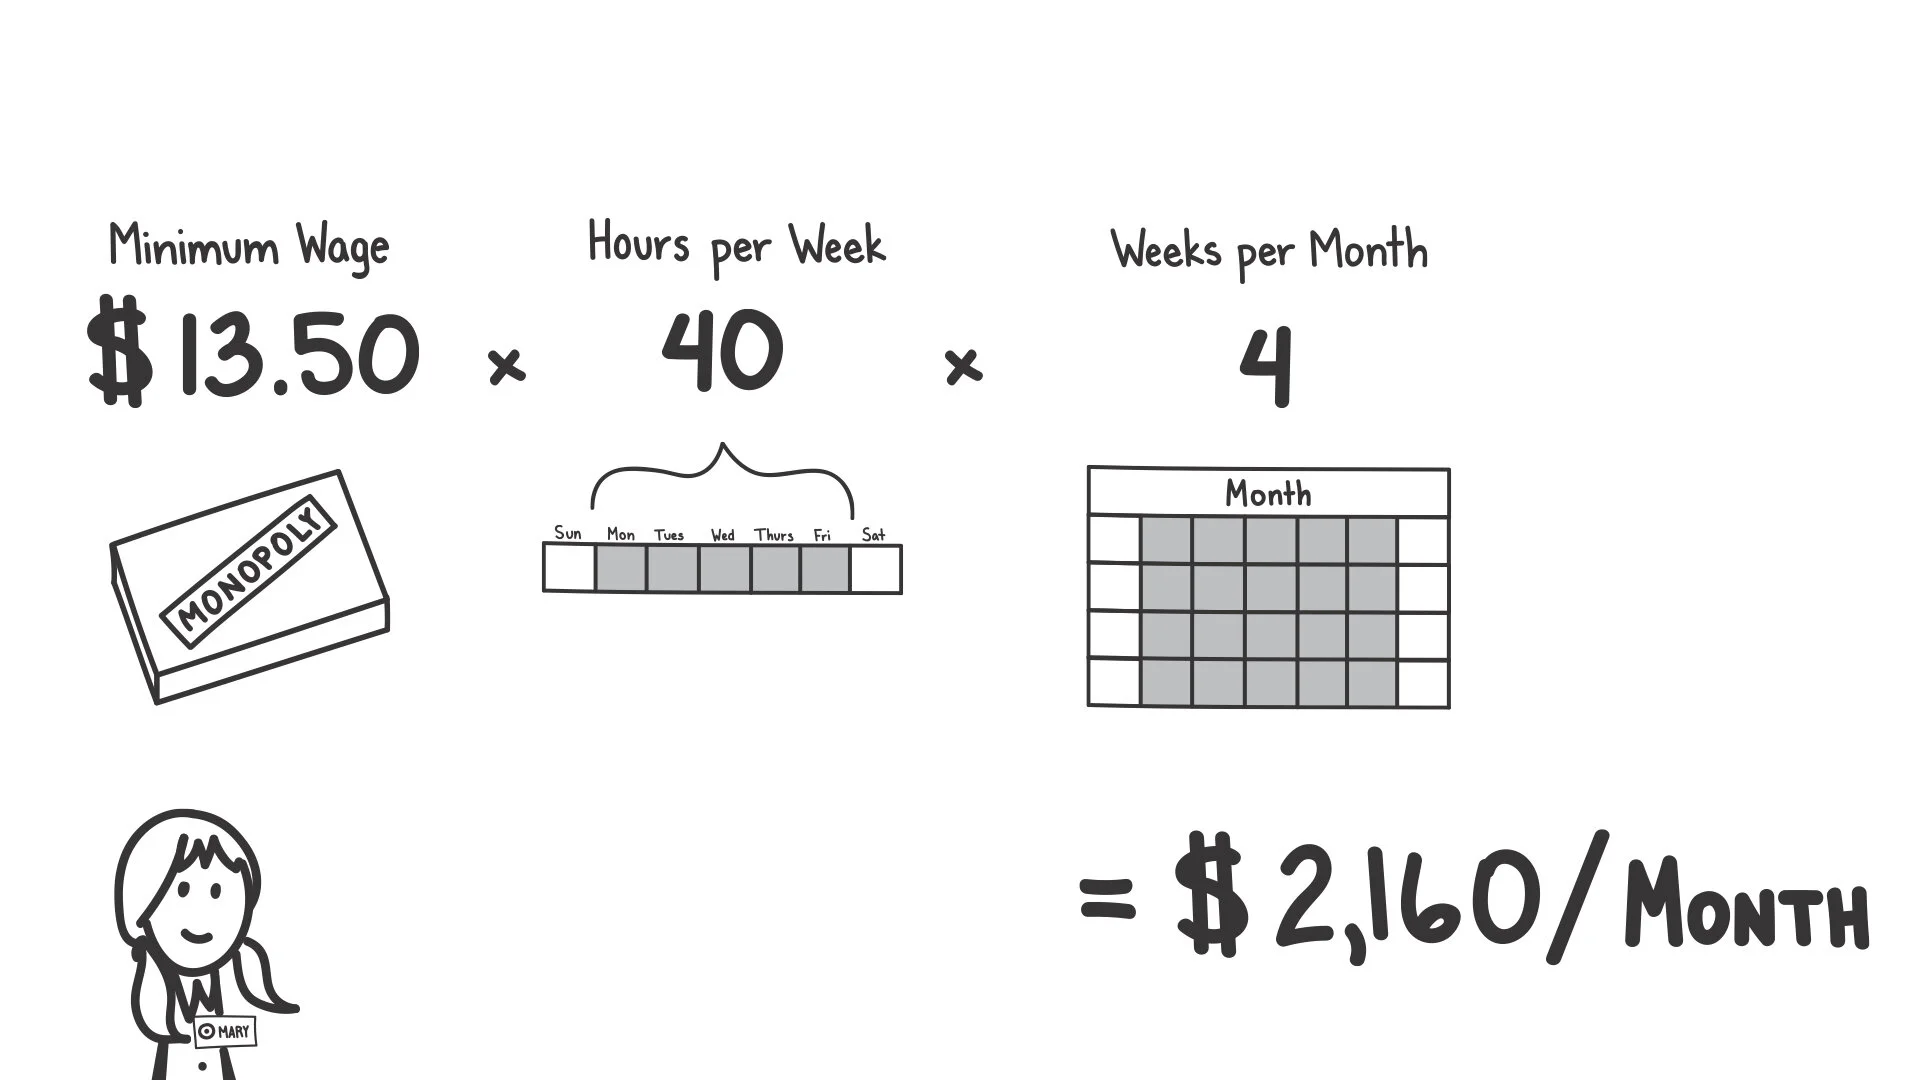
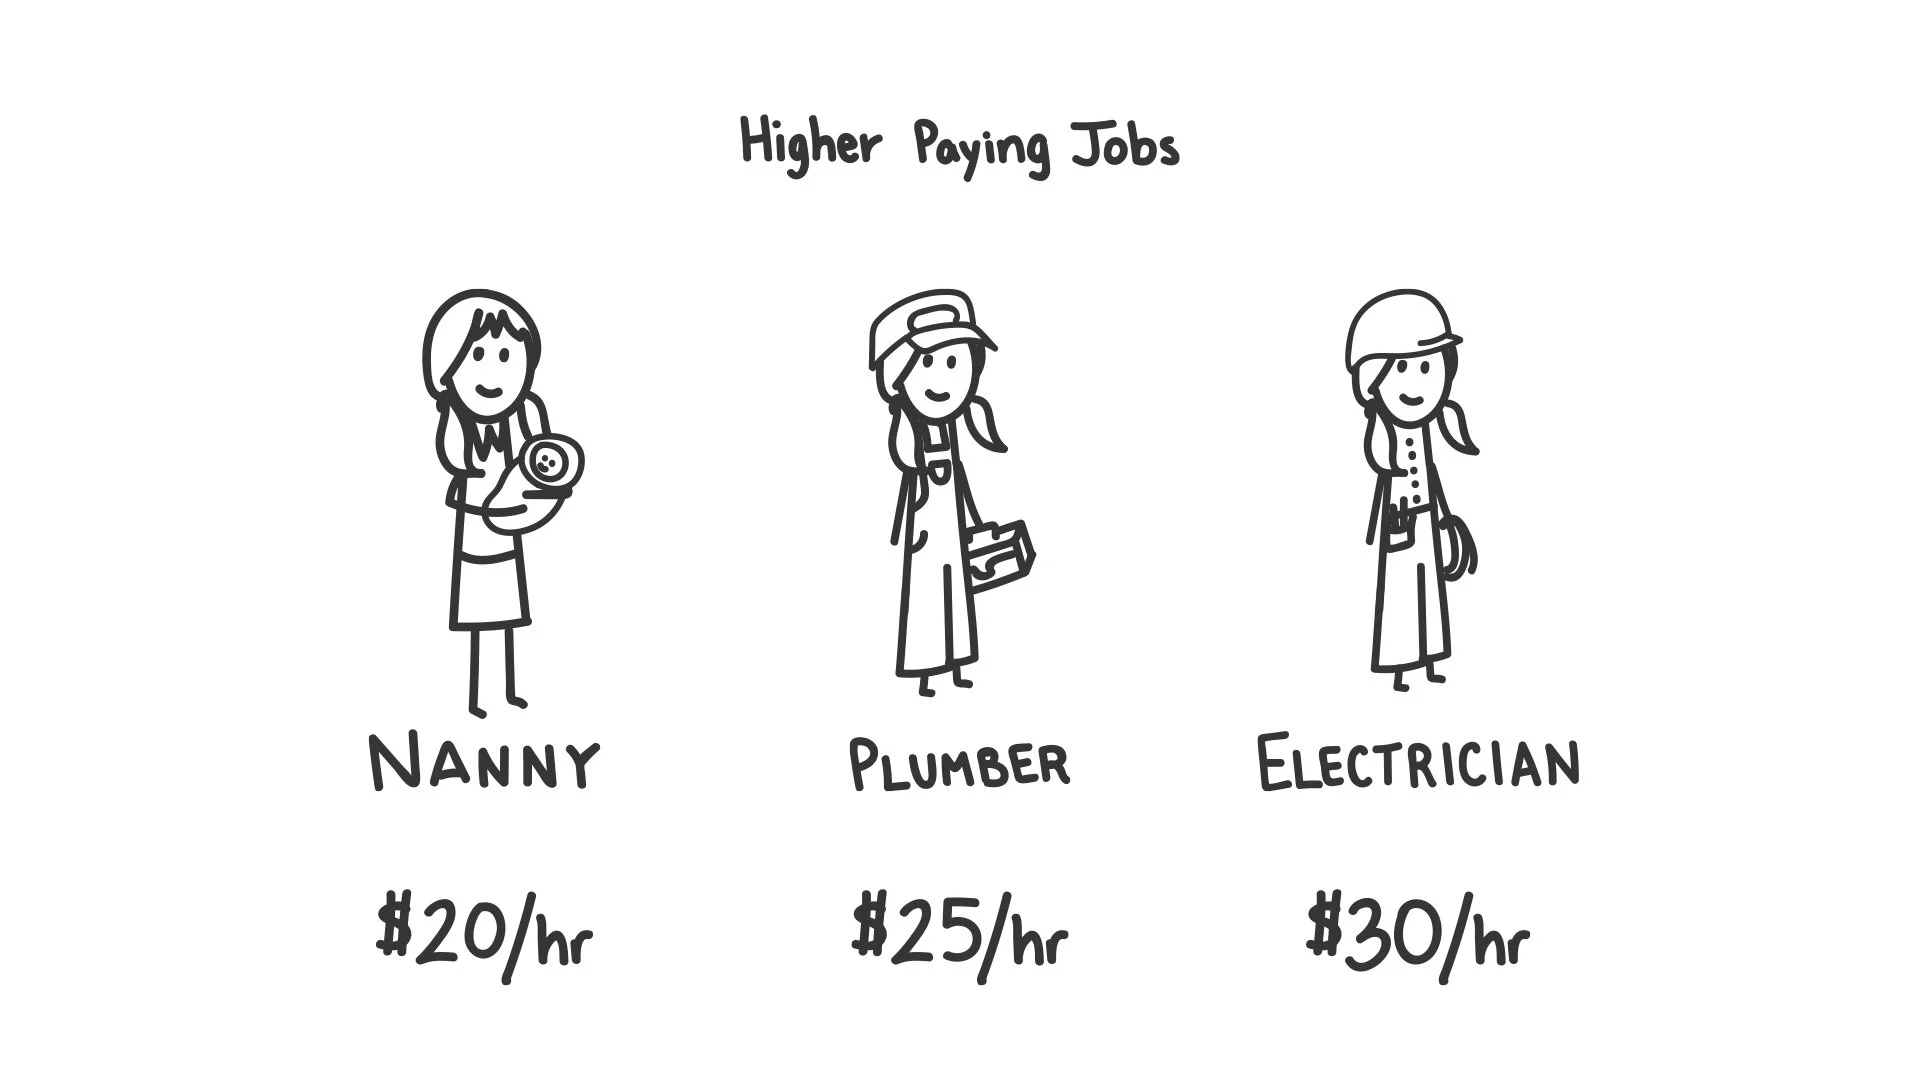
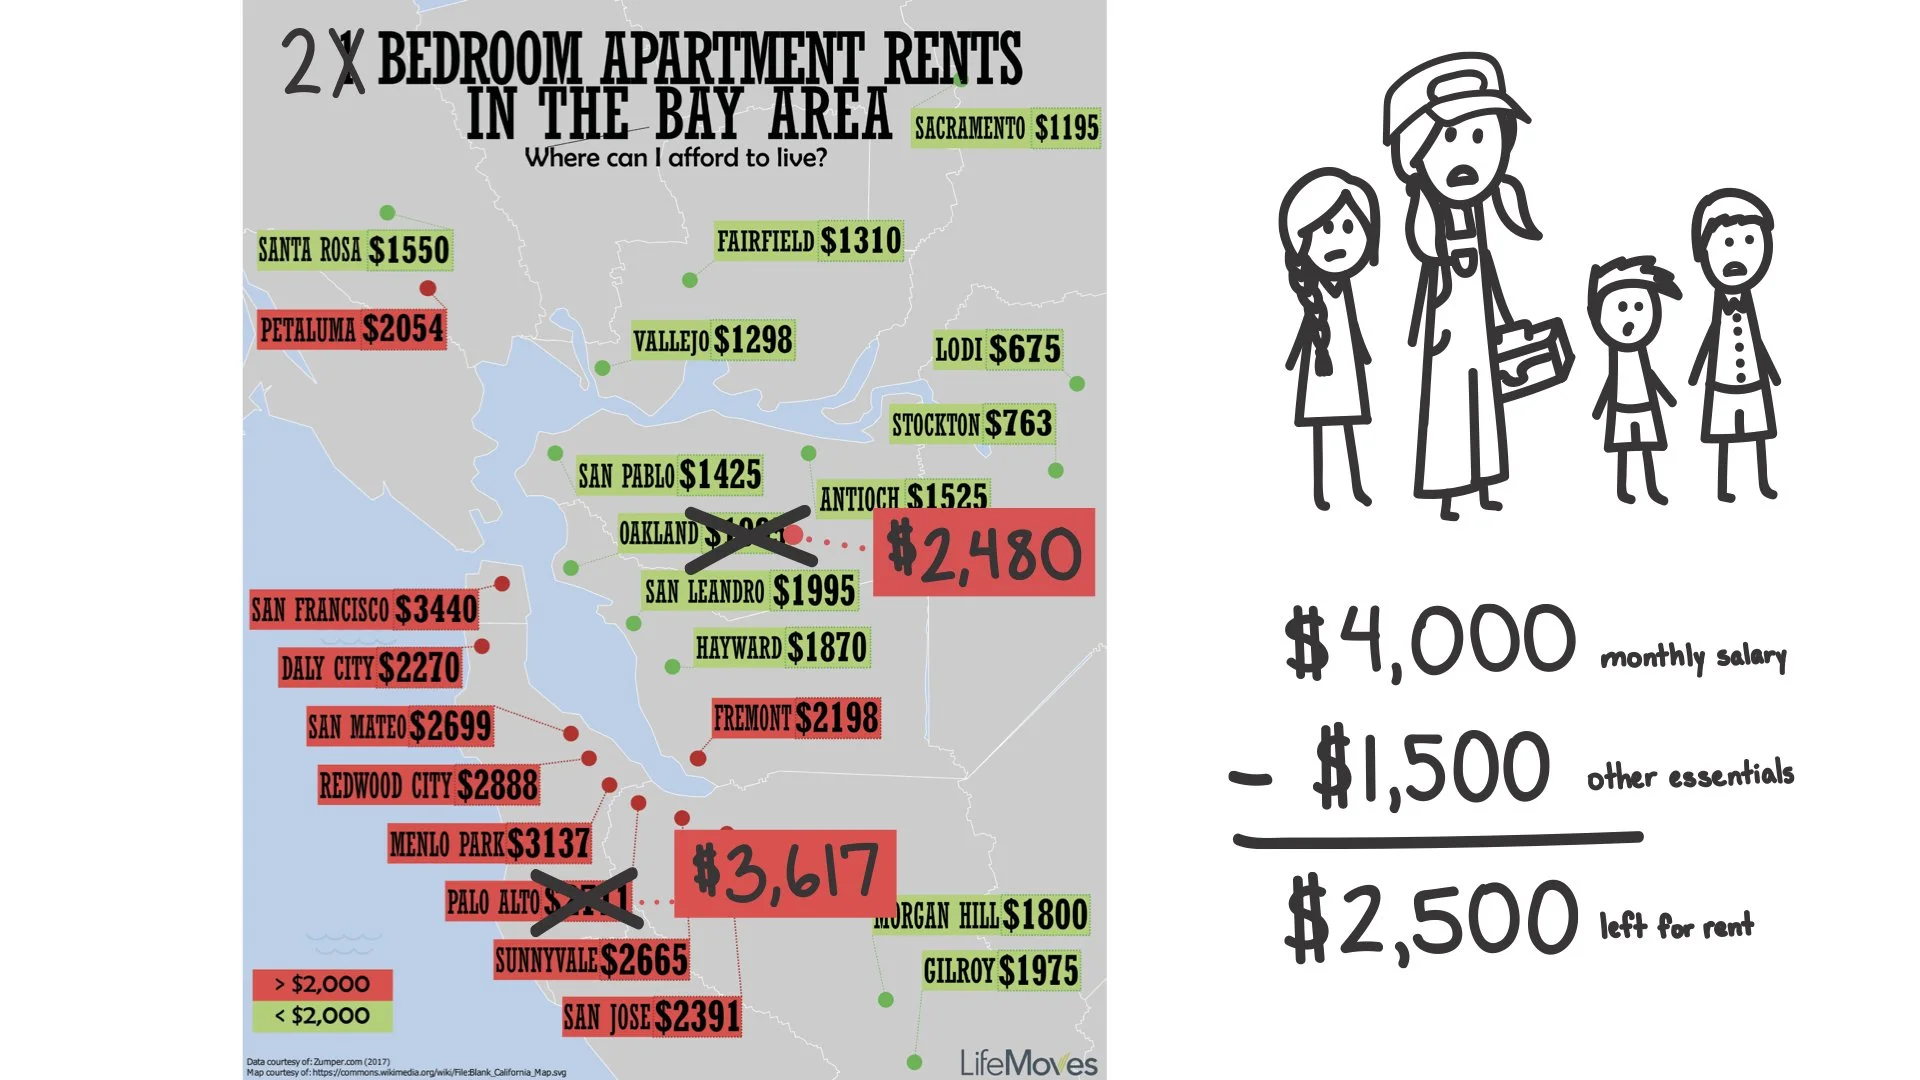
Costs of living: setting the scene
One aspect of the workshop discussed how expensive it is to live in the Bay Area before the kids try to make a budget. I drafted and created an illustrated presentation comparing two people with the same job in different locations - Sally in Kansas and Mary in California - to demonstrate how minimum wages and rent costs can vary dramatically.
I proposed using simple, illustrated drawings instead of stock images to create a more personal, relatable story for the kids.

Drafting the budgeting game
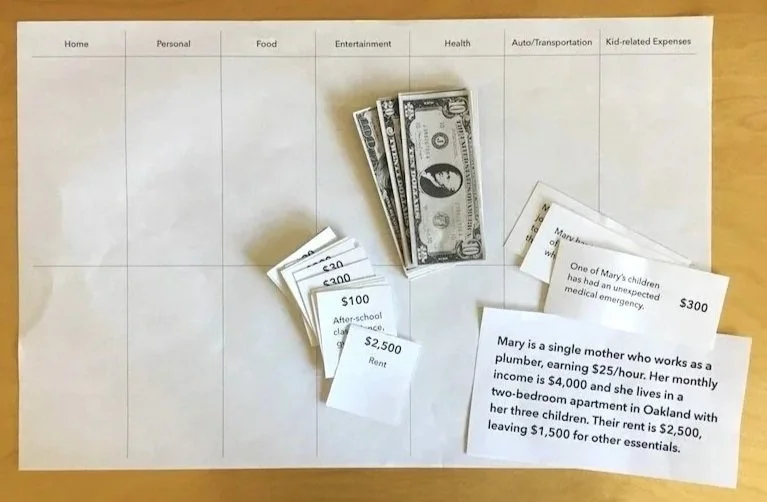
To demonstrate how high costs of living could lead to homelessness, LifeMoves wanted the kids to make a budget. We decided to incorporate physical items - play money and expense cards - to make the financial impact tangible.
I created a scenario based on the costs of living presentation, giving the kids a monthly salary and rent, then designed cards for essential and miscellaneous expenses with average costs, plus unexpected scenario cards to simulate emergency payments.
I drafted a board with expense categories where kids could place cards and money for expenses they deemed necessary. After playtesting with my coworker’s daughter, I made refinements like adding an expense list so kids could view all options at once rather than shuffling through cards.
Draft of the budgeting game
Testing and refinement
Prototyping the workshop
We ran prototype workshops with families to test out the flow and activities, gather feedback, and discuss any changes we wanted to make with LifeMoves. Key insights from the testing:
The budgeting game was the standout activity - all 6-7 families asked to take it home, with the physical money making the impact tangible for kids
Kids were worried about having leftover money, so I clarified in the instructions that it was acceptable. They later saw the value in it when presented with the unexpected scenario
The Costs of Living presentation resonated with all the families, but younger kids struggled with the math calculations. I added visual progressions to show the math calculations, and included relatable examples like toys and games to help kids understand the value of $10-20
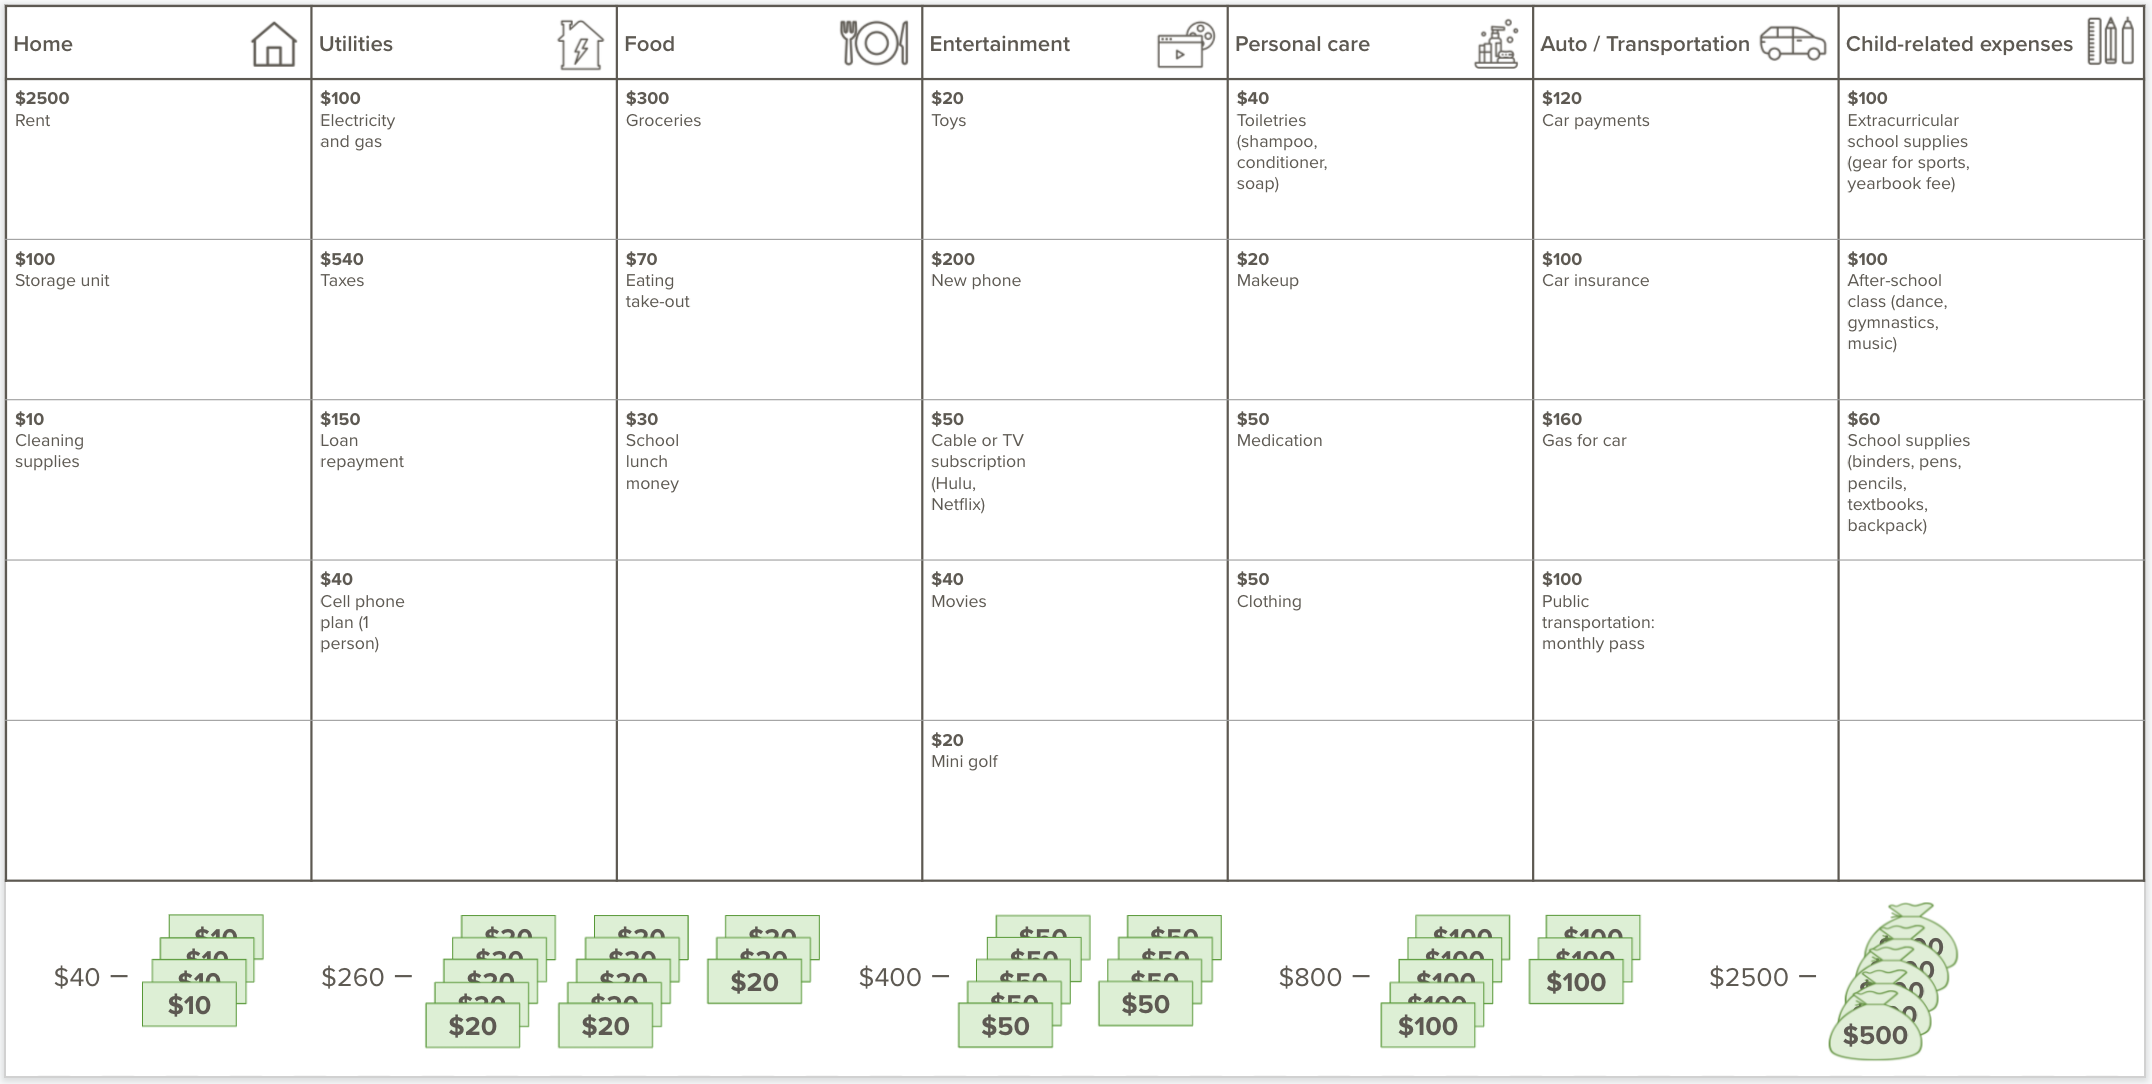
Final look of the budgeting game
Step-by-step progression to show the math calculations in the costs of living presentation
Adapting the game to online
When COVID-19 shifted the workshop online, LifeMoves approached us to redesign the activities to a virtual setting. I adapted the budgeting game to Google Slides, creating a drag-and-drop interface with the same elements as the physical game. After testing several layouts, I landed on a design that fit all the elements on one screen without overwhelming users.
A first draft of the online version, which was too clunky and crowded

The final version, where expenses are already in a grid and the kids just move money into the expense box they want
Additional contributions
Creating other artifacts
I created additional workshop elements including:
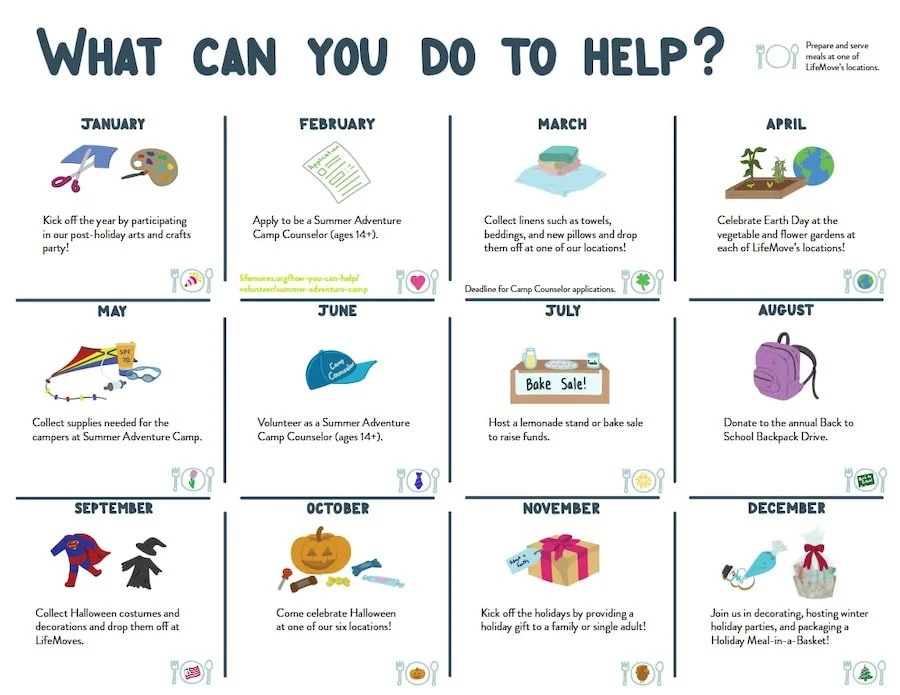
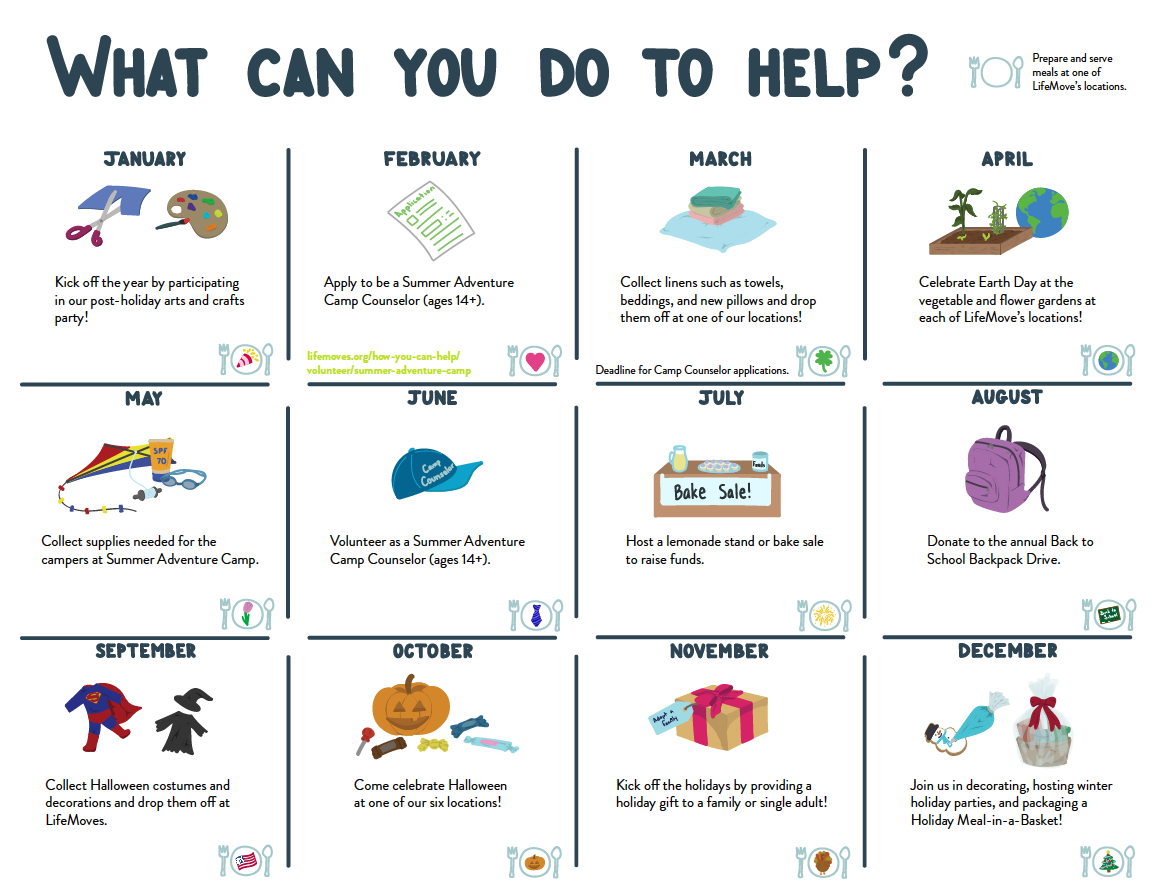
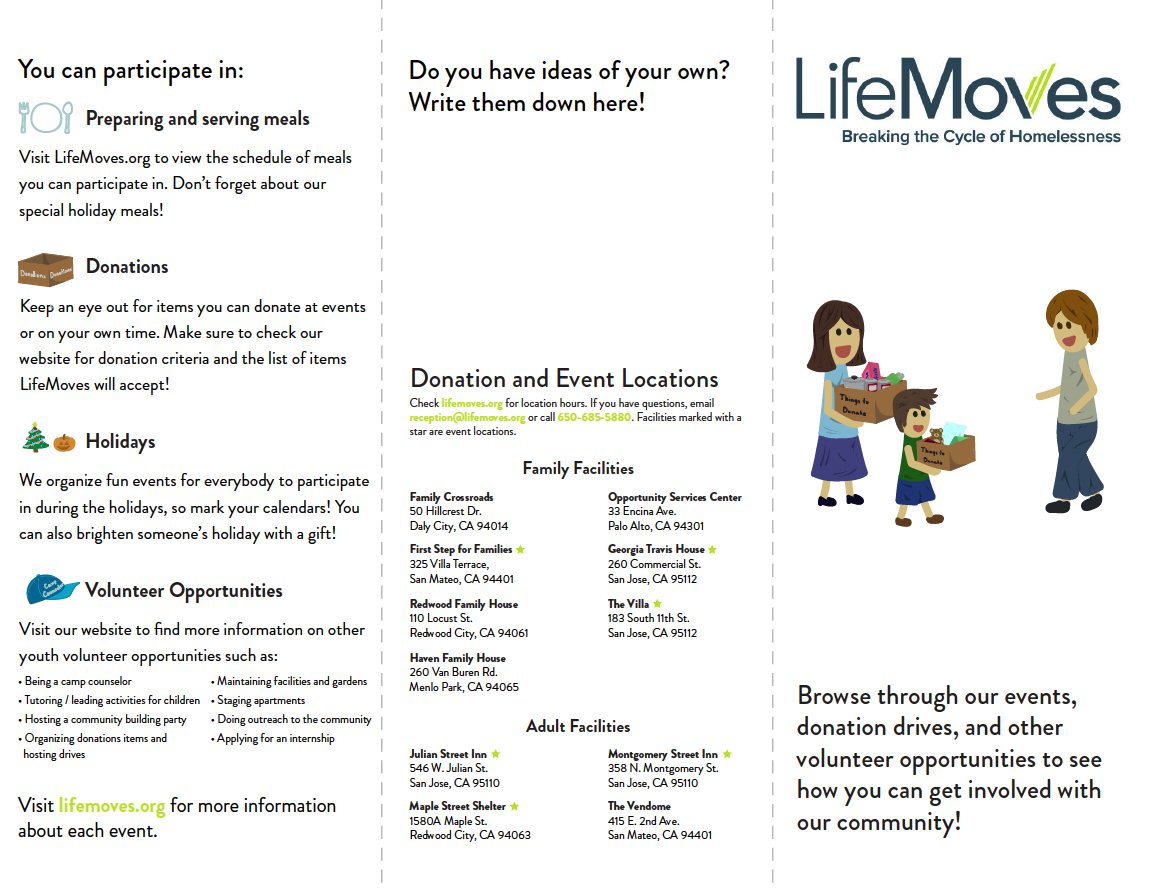
An illustrated brochure of LifeMoves events volunteers could attend throughout the year
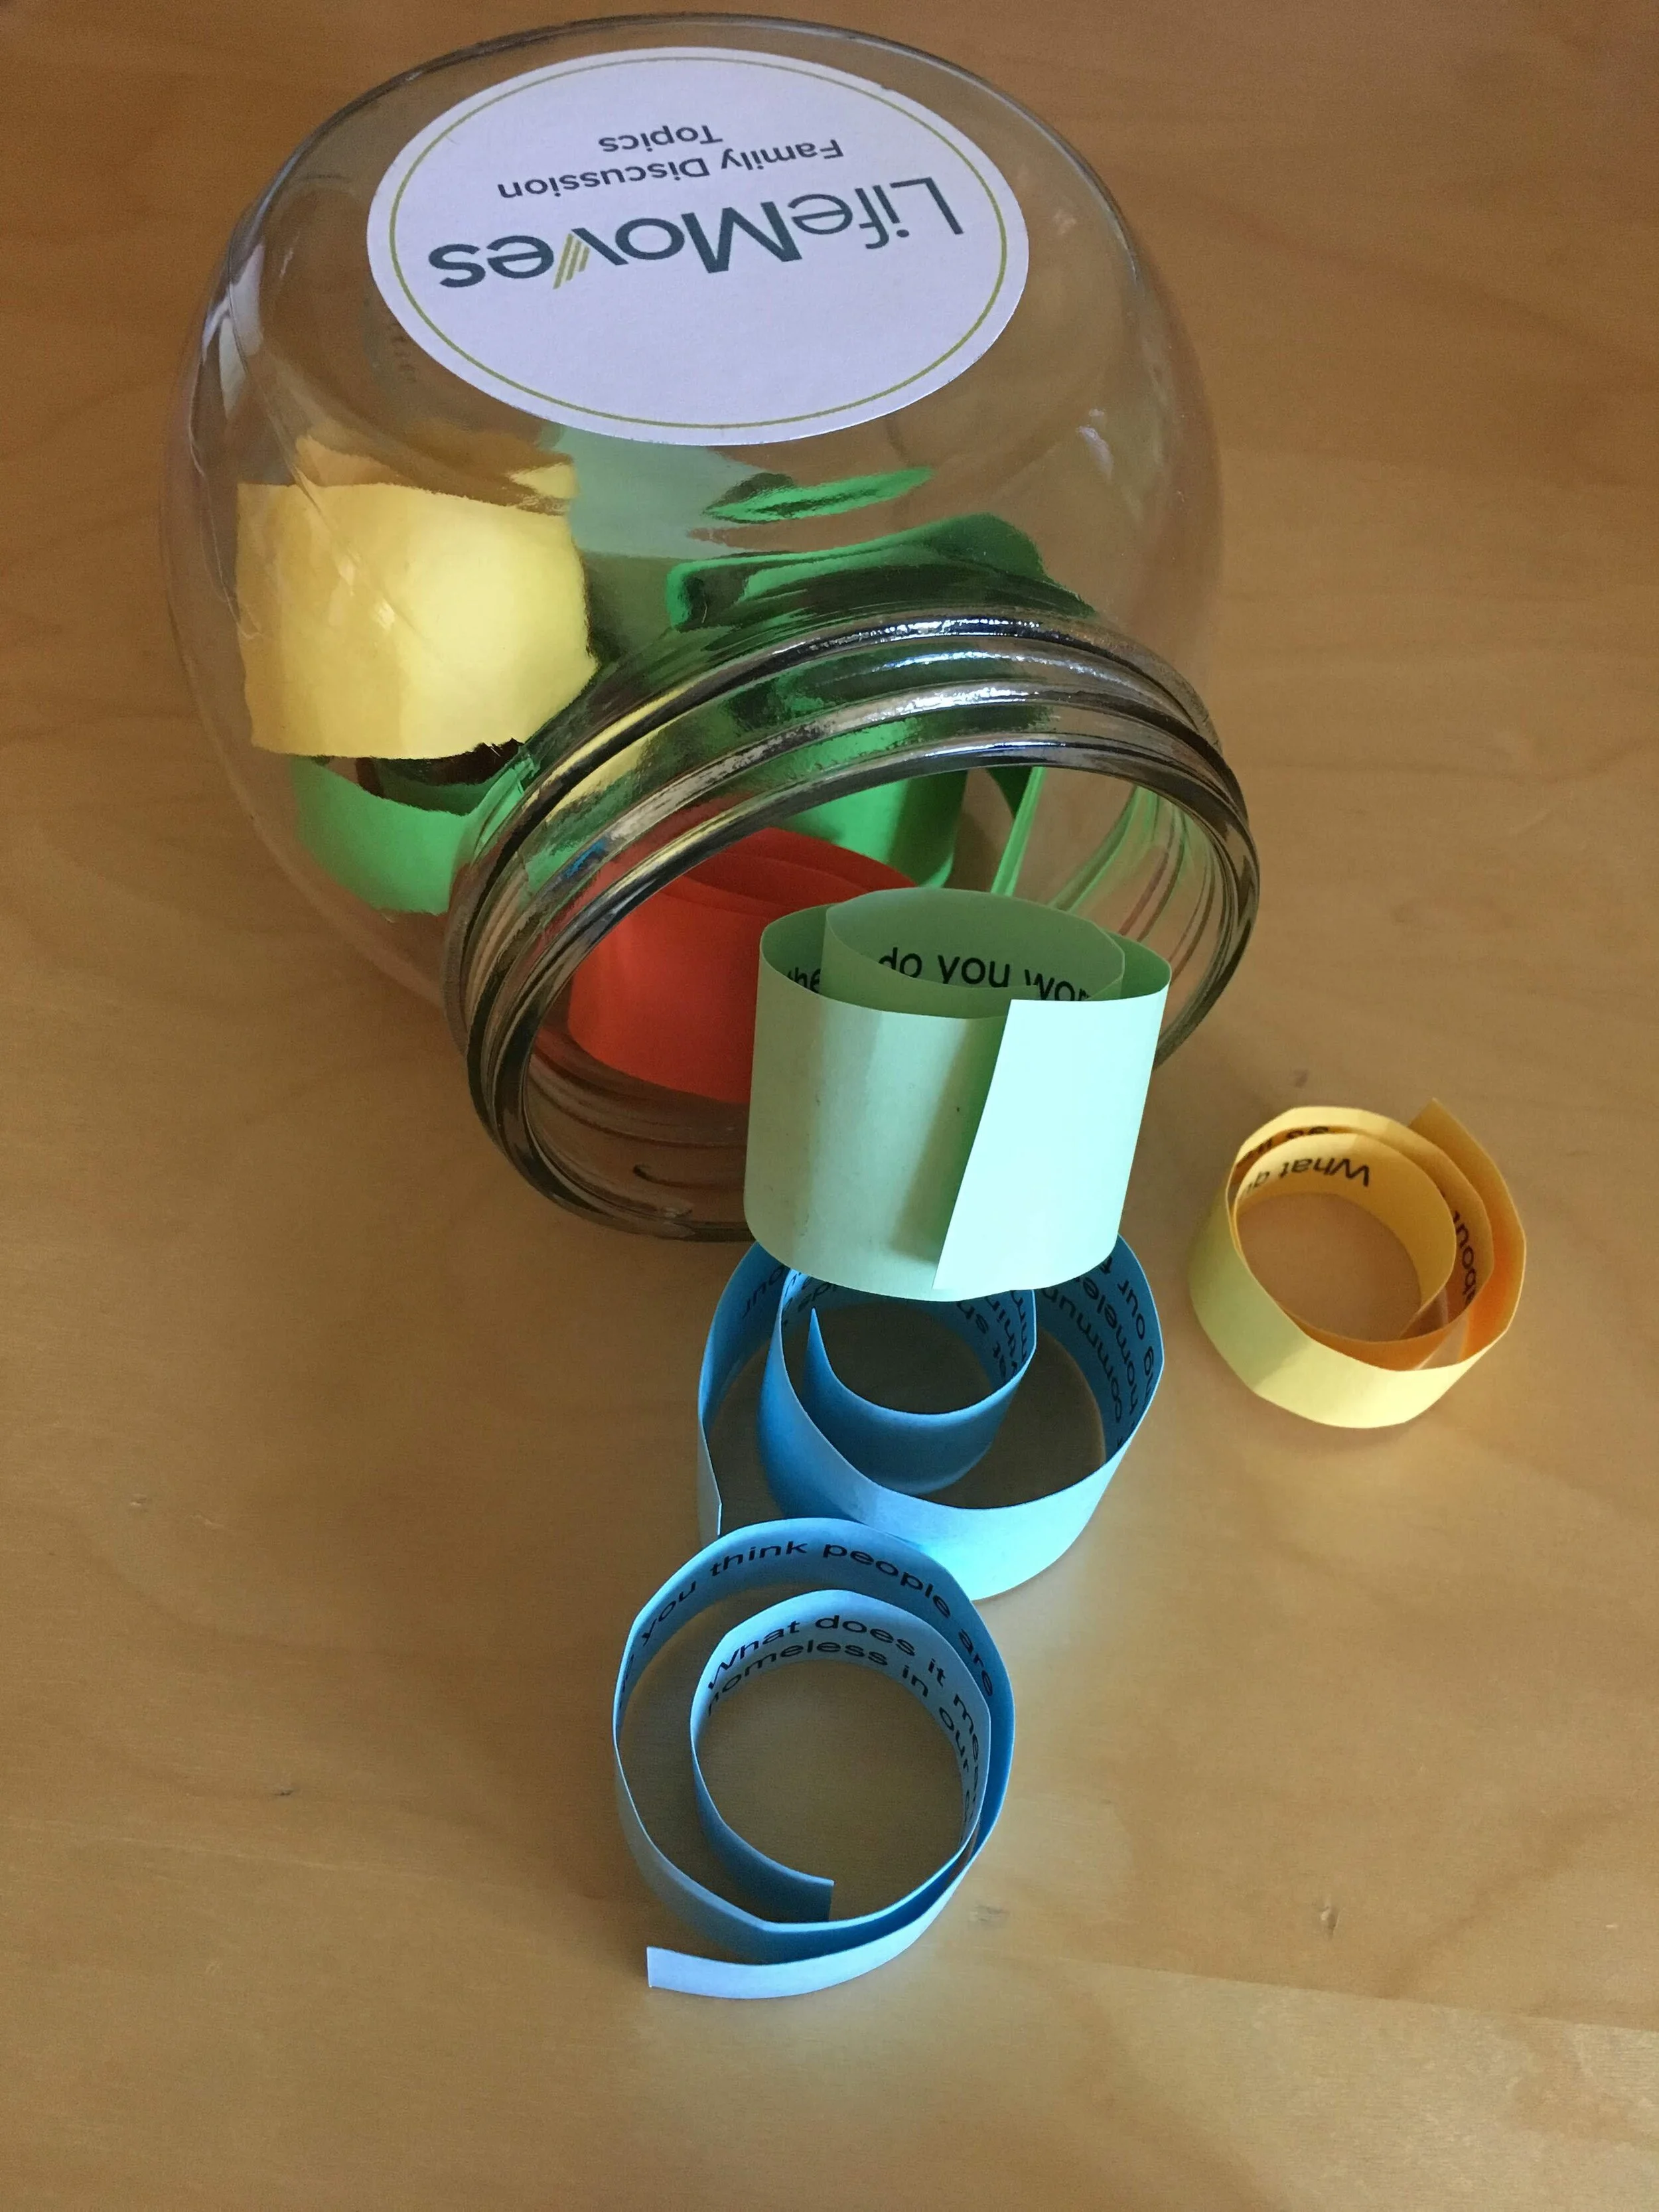
Conversation starters to continue discussions at home
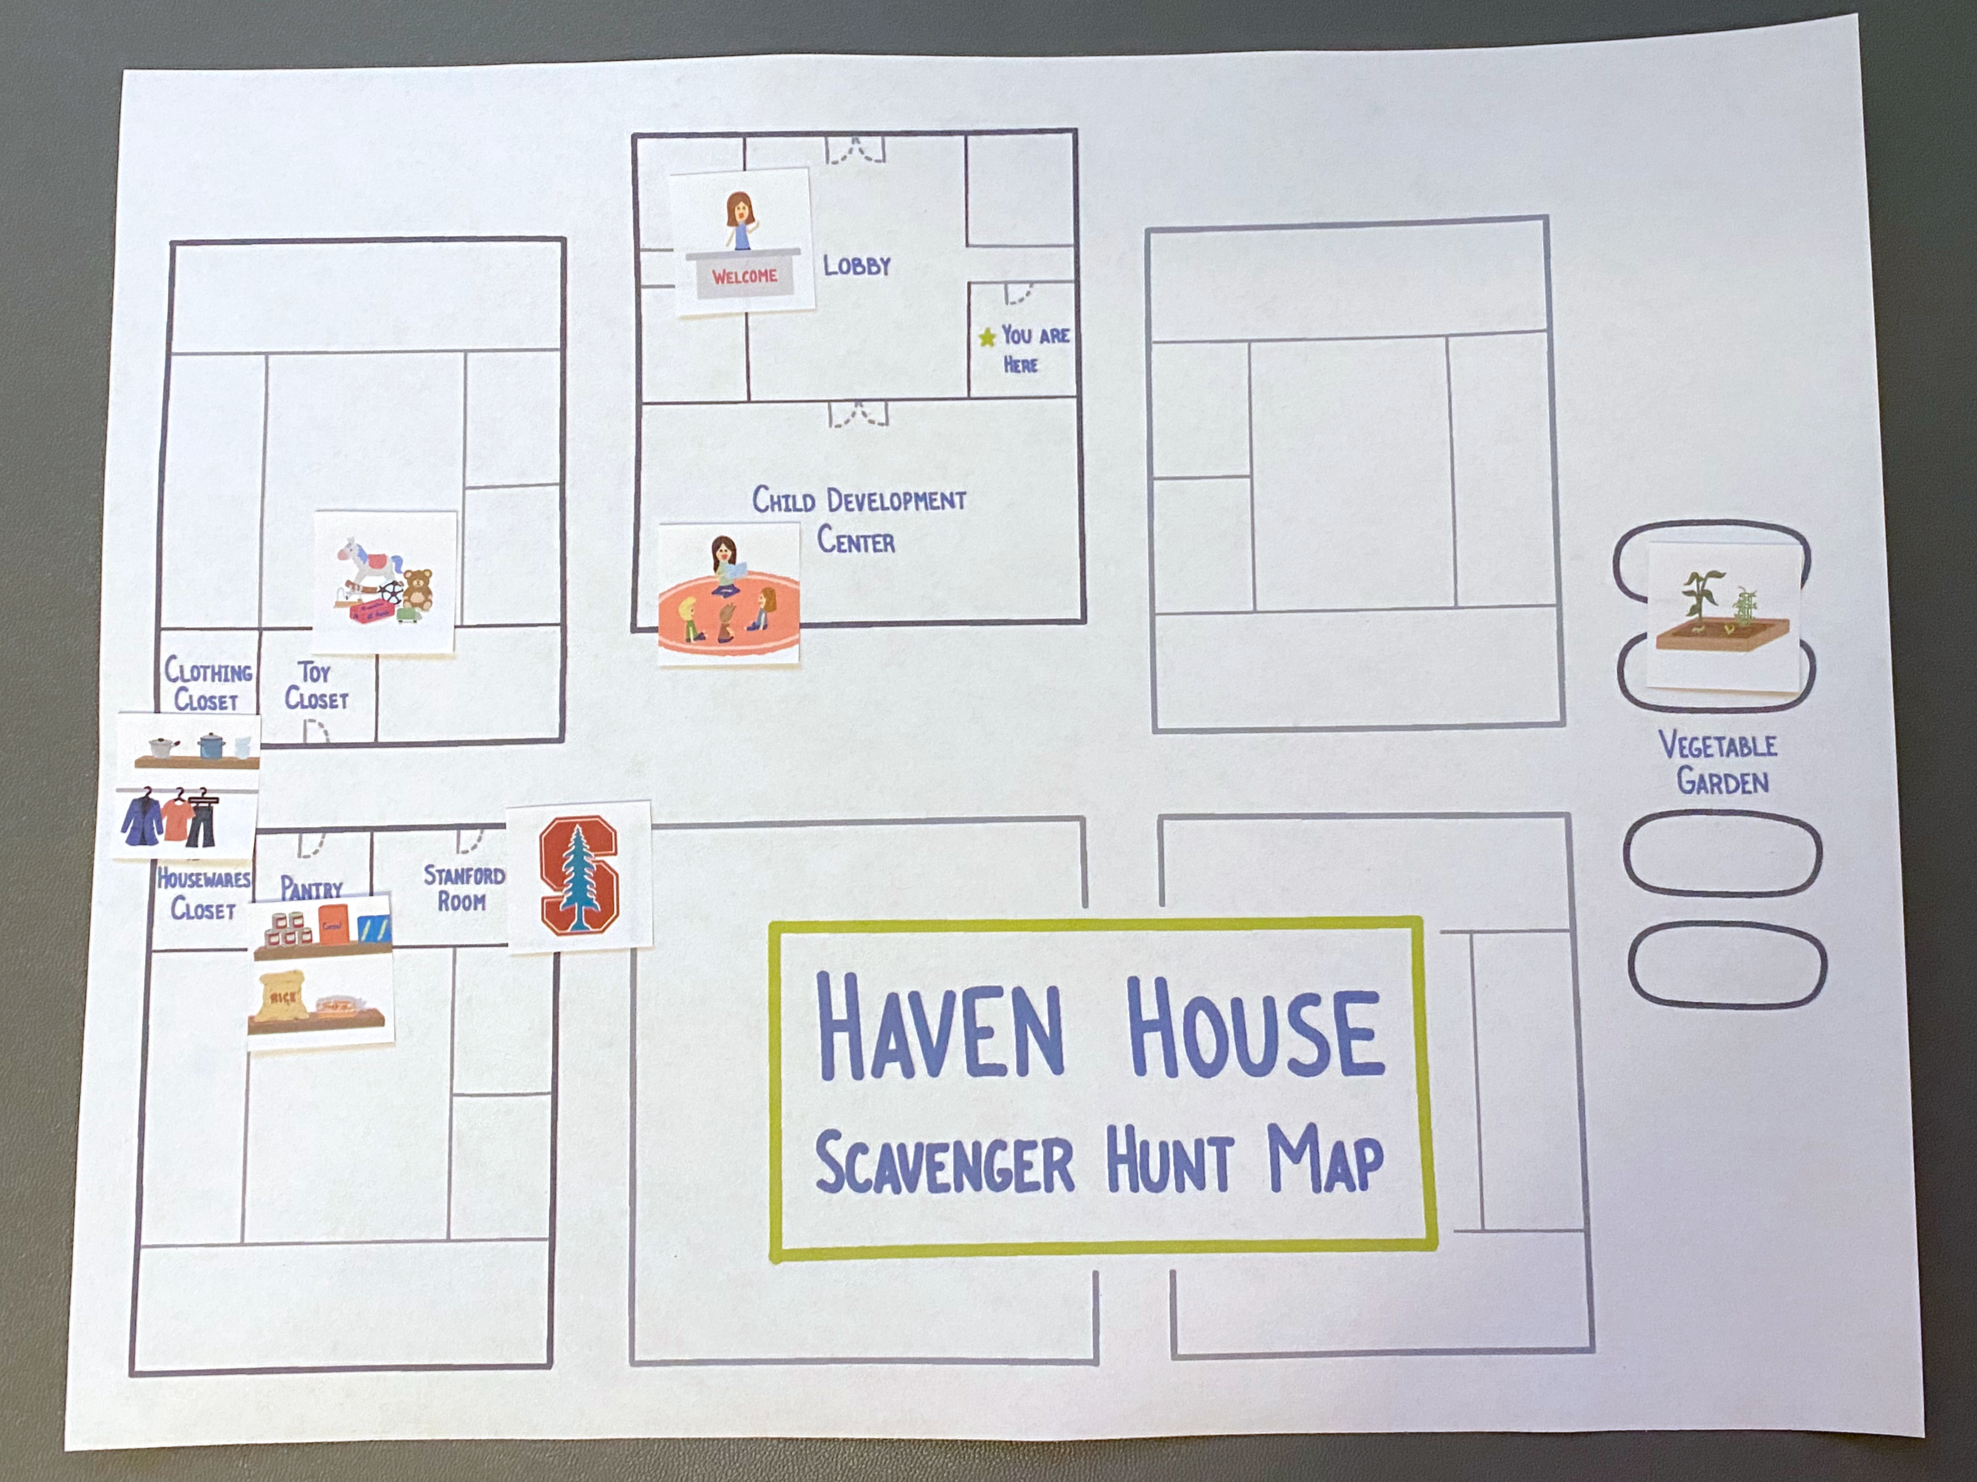
A scavenger hunt tour with riddles and location-specific stickers to maintain energy during facility tours
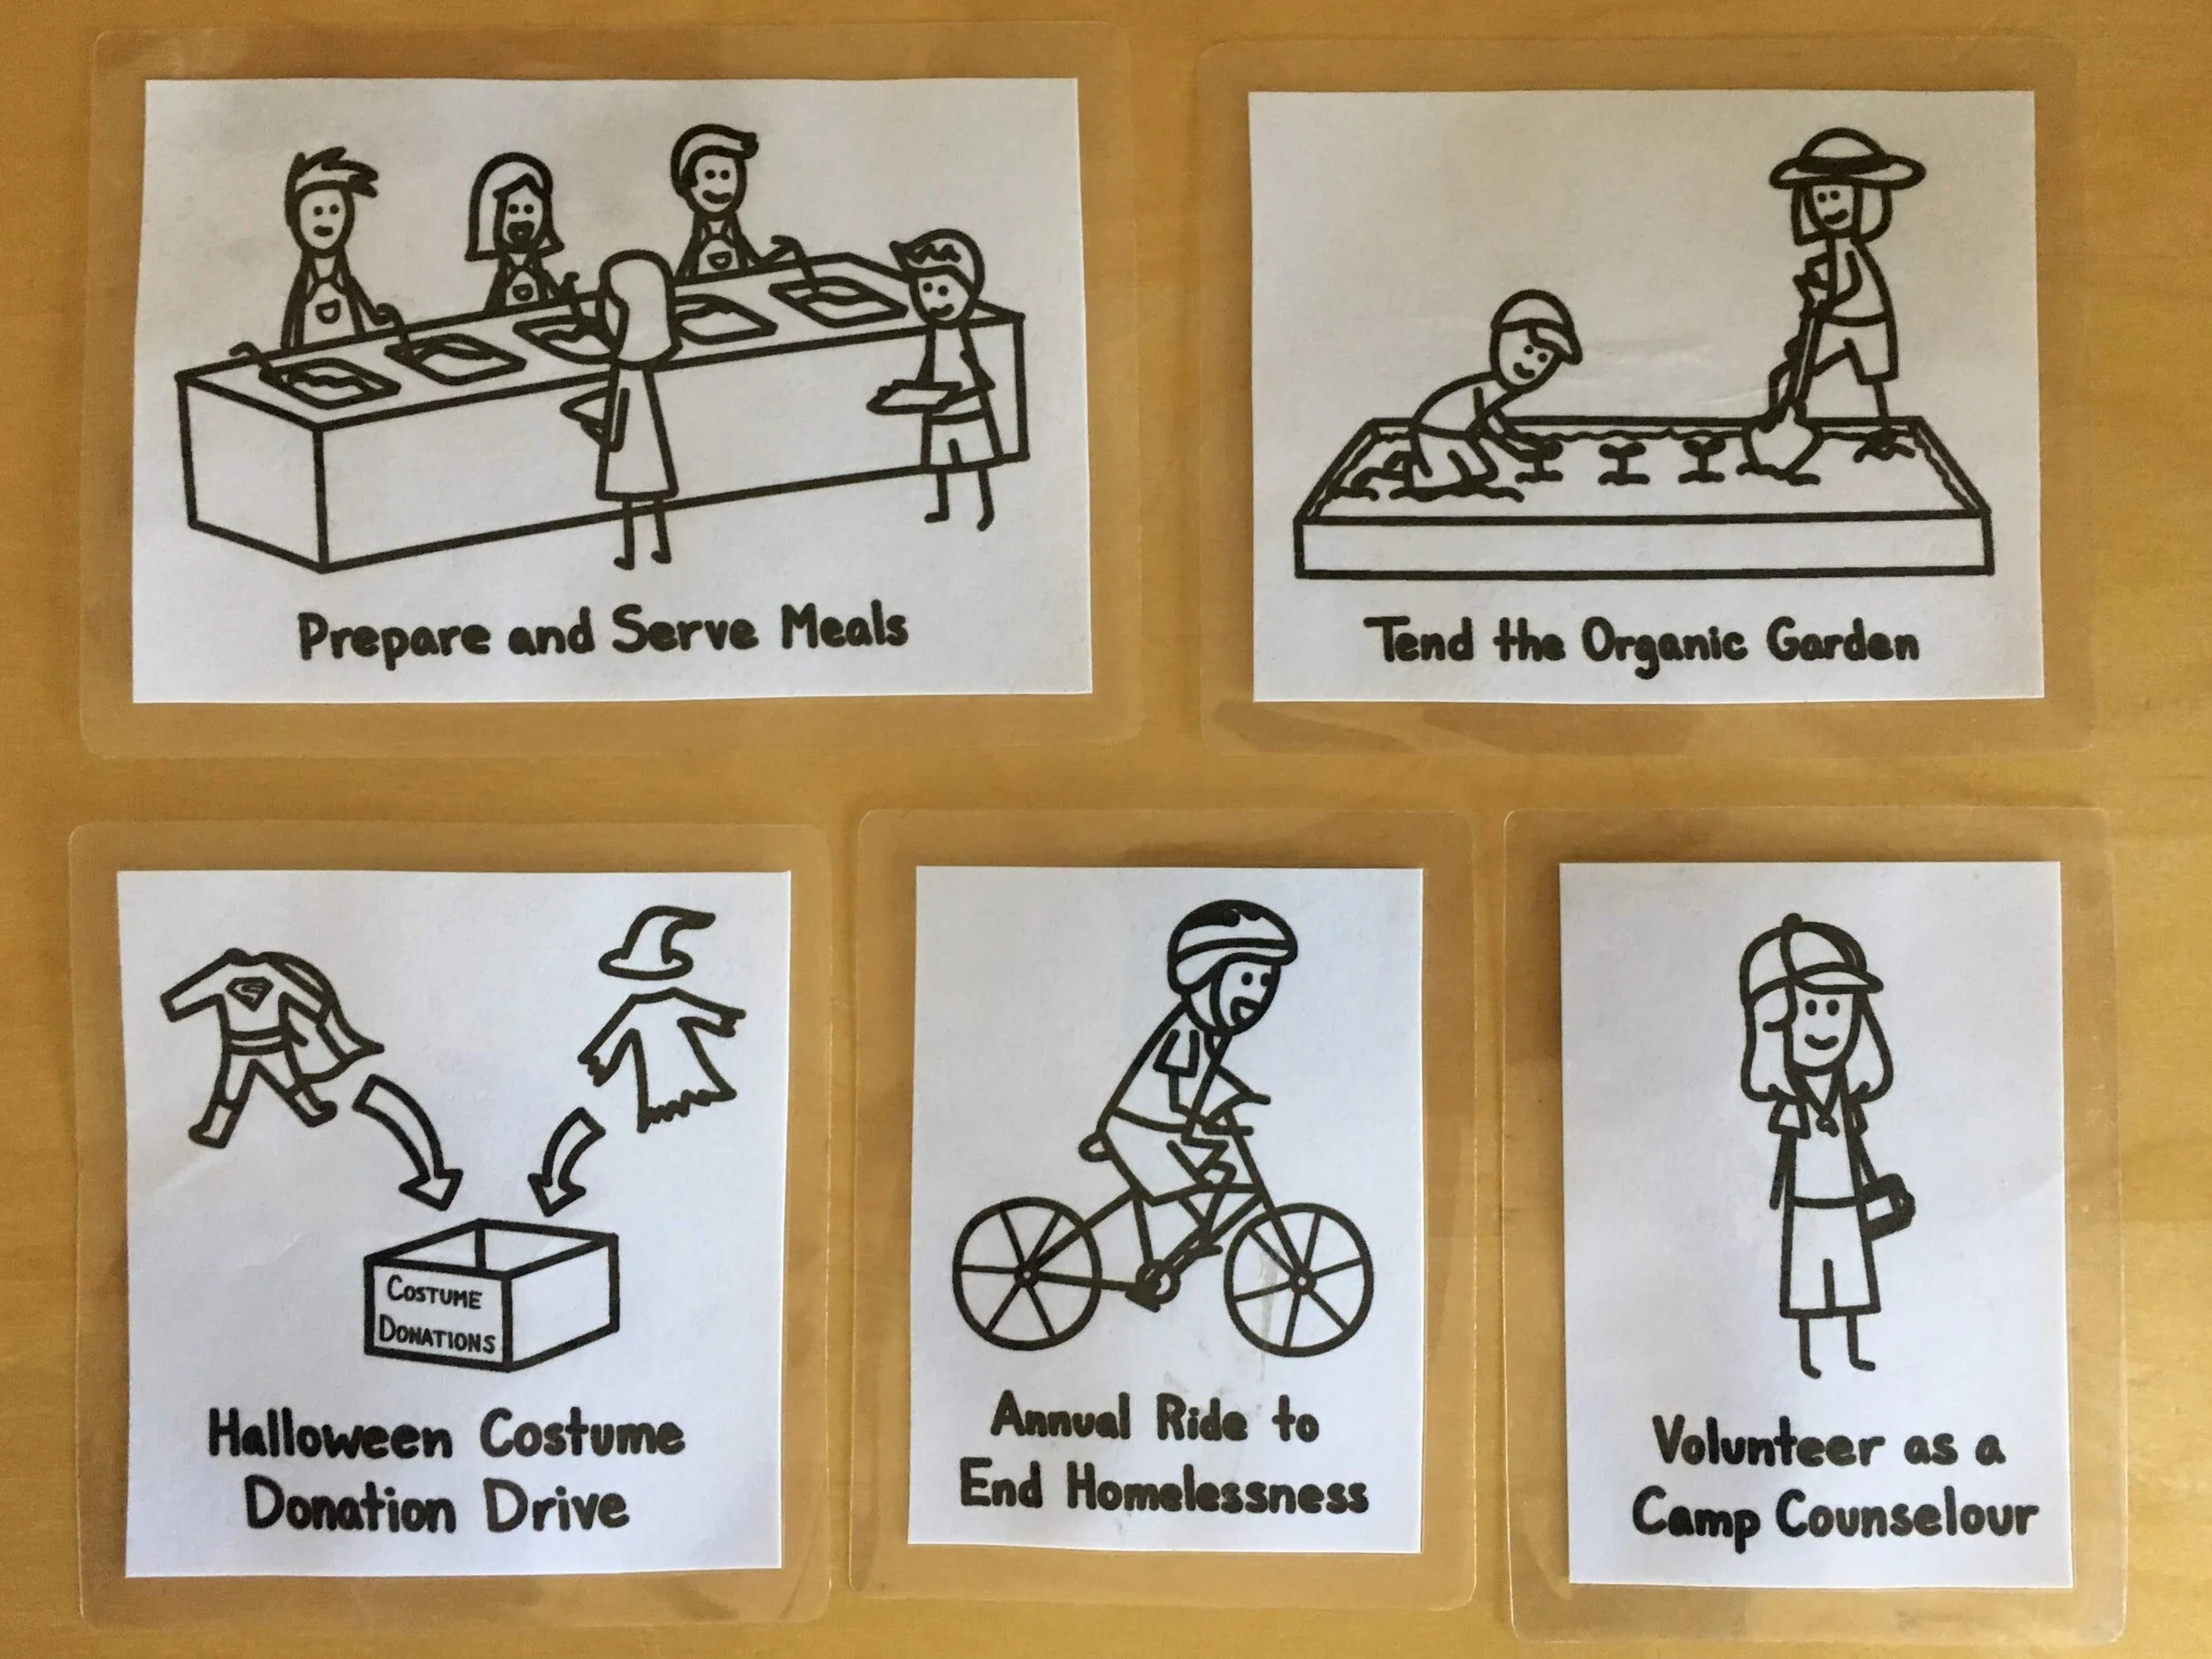
Illustrated artifacts representing different volunteer opportunities
The impact
Continuing the conversation
After successful prototype workshops with 6-7 families, we helped LifeMoves launch the first official workshop with 4-5 donor families. LifeMoves continued hosting in-person and virtual workshops. Feedback was positive - families loved the activities and requested more information on community involvement, while kids asked about direct ways they could help, including at their own schools.
My favorite moment came when one child discussed expenses with their parent during the budgeting game. Facing the emergency scenario, they decided they personally didn’t need new clothes or their after-school class - enough to cover the emergency. It demonstrated the kind of empathy we were hoping to foster.